How to Put Up A Fence in 8 Easy Steps.
Setting up a fence may seem like a daunting task but you can set up a fence with 8 easy steps.

image source: Walk Arlington
Step 1 of installing a fence is to clear debris along the fence line.
It’s important to clean the area around your fence for multiple reasons, but safety and efficiency are two major components effected by this first step. Debris can be anything from trash to loose plants, it also includes inspecting the area for property lines, underground plumbing (sprinkler systems), and other important things. If you’re not sure where your property line is, consider contacting us to come out and inspect your property.

image source: Inch Calculator
Step 2 of installing a fence is to measure out your yard and where you like to place the fence.
You will first need to mark and identify where to position the post, the start of a good fence is a good foundation. You will need about 6-8 ft between each post depending on what you decided to use as your fence. If you decided to use pickets to build your your fence your post wont have to be as far apart, however if you’re using a panel the post will have to a little bit further apart. Once you have the measurement of your yard then you can lay the pickets or panels down and kind of get a feeling of how your fence will look once completed. This is step will kind of be like an outline of your fence.

image source: Dunn DIY
Step 3 of installing a fence is digging holes for the post.
This step is going to be one of the most pivotal steps of building a fence. The post is the backbone of a fence so you going to want to be very cautious when doing digging the hole. Starting with the diameter of the hole, you are going to want the diameter of the hole to be 3 times the width of the post. For example, if the the width of the post is 4 inches you are going to want the diameter of the hole to be 12 inches. Next is the depth of the hole, you will want the depth of the hole to be 1/3-1/2 of the post height above ground. For example, a 6 foot tall post would need a hole with a depth of at least 2 feet.
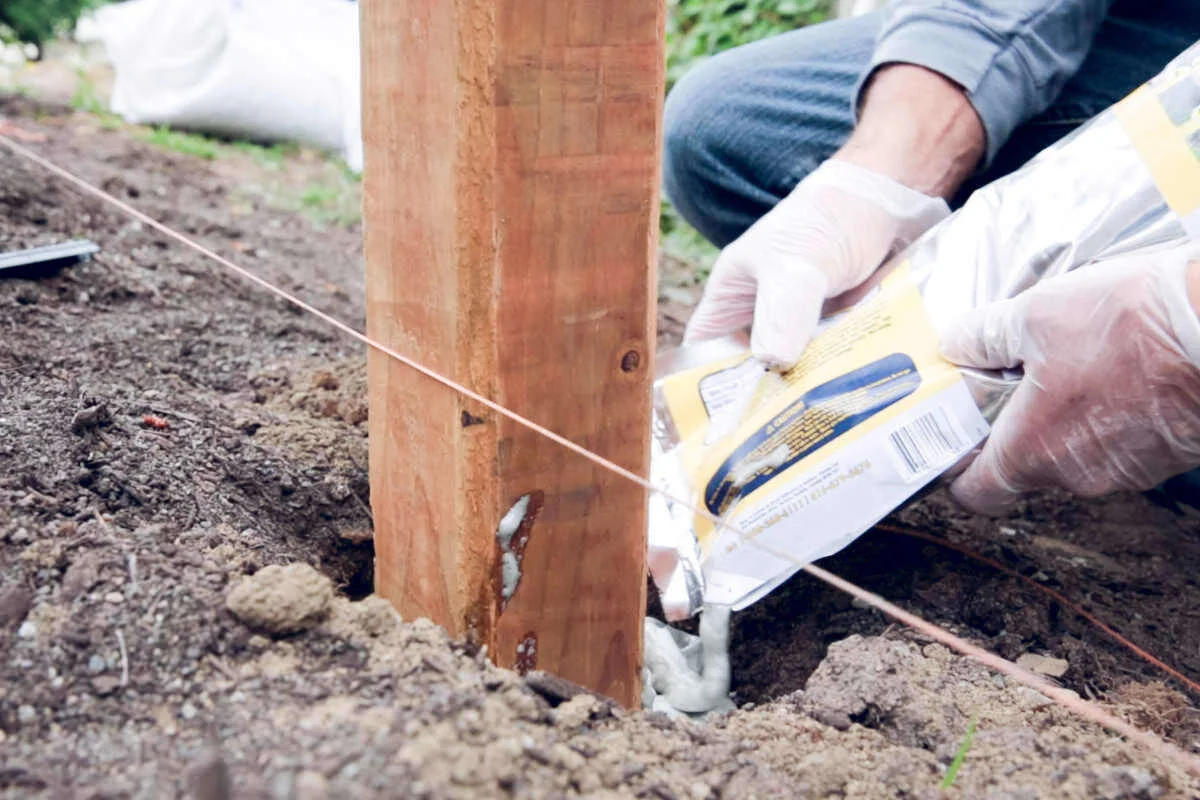
image source: Dunn Lumber
Step 4 of installing the fence is to install the post.
Once the holes have been properly dug then it is time to install the post! The first thing you will want to do when installing a fence is to pour around 6 inches of gravel to the bottom of the hole. The reason for pouring gravel in the hole is because it provides a very solid base for the post to sit on. It also prevents the post to come in direct contact with the soil, which can also avoid rotting. Once you have the gravel is in the hole you will need a some help. You will want to hold the post perfectly vertical. While holding the post you will need to then pour a dry fast settling concrete down the hole. Heads up this will be a very dusty part of the job, we recommend wearing protective eye wear and a mask to avoid breathing in the mix. You will want to pour mix until it is about 3 inches below ground level. Once you have poured the mix you will want to then slowly add water to the concrete mix. The reason you add it slowly is so you give the water a chance to seep down and saturate the mix. Then you are going to let the mix dry which can vary depending on the mix you use, the usual wait time is going to be around 4 hours.
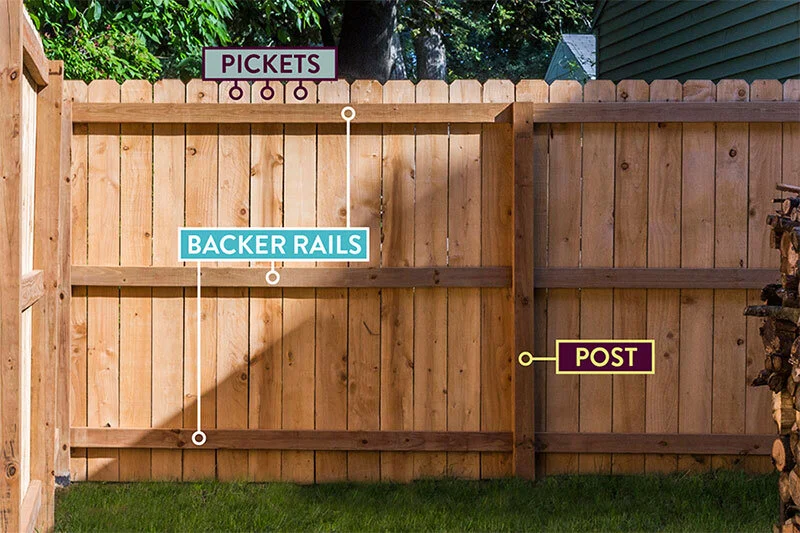
image source: Outdoor Essentials
Step 5 of installing a fence is attaching the rails or panels to the post.
Once you let the concrete cured you are first going to make sure the post is secured and isn’t going anywhere. It is time to attach either rails or panels to the post. If you decide to use pickets for your fence you will need to install rails to the post, but if you decide to use panels the rails are attached to panel already. Panels are generally the easier of the options to install. If you decide to use a panel are your fence, you can disregard step 6. To install the rails or panels we recommend using a screw that is about 2-3 inch long, but this also depends on the wood you decide to use as your fence.
Step 6 is going to have you attach the pickets to the rail.
If you have decided to use pickets instead of a panel for your fence this step is for you. Once you have have the rails secured on the post then you can attach the pickets to the rail. The first picket should be placed in the corner of the rail and the post. Secure using the same screw as the panel or you can use a nail actually. Once you have that secured the next thing you’re going to want to do is place the next picket to the first one and use a screw and nail to secure that picket to the rail. Then continue to install the rest the pickets in the same manner.
Step 7 is going to be installing post caps.
Now you are almost finish building the fence. Post caps are exactly a necessity, however to give your fence a more finished and distinguished look we recommend installing post caps. Not only does a post cap finish the look it actually will expand the lifespan of your fence as well. The post cap will help prevent water from soaking into the wood to stop decaying. To install a post cap we recommend using a exterior grade construction adhesive. Apply the adhesive to the inside of the cap, then place the cap on top of the post. Or, you can use a rubber mallet to install the post cap as well.

image source: Toolblaze
Step 8 of building a fence is going to be to stain the wood or just treat the wood.
Just like we have described in a previous blog this is the time to stain the fence. Staining a fence does not only take the look of your fence to the next level, but it also expands the lifespan of your fence as well. Just a quick recap of how the stain a fence, you will have 3 options roller, brush, or a professional air sprayer. Like we said we suggest using the air sprayer to stain the fence, just because an even and natural coat of the stain. You should also add wood preservation toward the bottom of the post to help with any rotting or decay. Applying a new coat every 2-3 years is extremely important to help with the lifespan of the fence.